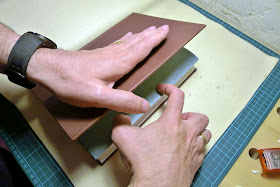
We’ve reached
the final stages now, just the endpapers and that’s it.
Right then, first thing we need to do is prep the inside of the boards to receive the endpapers. To make life a little easier place some boards under the cover when open to prop it up and then use a blanket to protect the leather.
We’re going to trim back some of the turned in leather so we need to mark where to make the cut. Use the point of your bone folder and a straight edge.
For our first cut I use a No 25 scalpel blade and using the back of the blade cut in from the edge of the board. Not the other way as you may add a little too much pressure and cut into and through the joint.
Now using a
No 10 A scalpel lift the excess corner leather and peel away. As you get to the
joint lay the blade flat on the board and trim the excess.
We need to now remove the waste to reveal the
endpaper. So fold it a couple of times to make it easier to hold and then pinch
and tear making sure you’ve got the waste and the Fence attached to it.
Now cut a
piece of good quality paper that fills the inside area of the boards that
matches the depth of the remaining leather turn in and paste on.
Finally place some waste paper inside the endpaper
to protect the rest of the book and paste out the remaining leaf.
Remove the
waste and gently holding the pasted endpaper down, close the cover onto it.
Turn over,
open and smooth off with your folder.
I now place
acetate sheets between board and book block and leave to dry under weighted
boards for at least 24 hours.
That’s it. It
has been a long journey but we got there in the end.
I hope you've enjoyed these posts, but if there is anything I haven't covered in enough detail please let me know. Everything I do is self taught so if there is anything you feel I could be doing better or a way of making it more simple please don't hesitate to contact me.


No comments:
Post a Comment